Build Your Own LLM Chatbot with Python & LangChain (Part 4)
Posted on 28 Feb 2026
Introduction
In the previous articles of this series, we progressively built our LLM chatbot from scratch:
- Part 1 — Core architecture and conversation management
- Part 2 — Logging, configuration, memory management, and production-ready structure
- Part 3 — Retrieval-Augmented Generation (RAG) with a vector database
Now it’s time to take the last step.
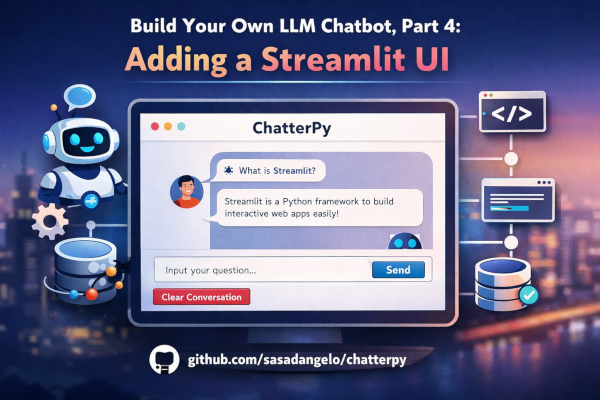
In this fourth and final article, we’ll add a Streamlit-based UI to transform our backend chatbot into a real interactive application. By the end, you’ll have a clean, user-friendly web interface that makes your LLM system immediately usable — not just programmable.
What Is Streamlit?
Streamlit is a Python framework that allows you to build web applications with minimal frontend effort. It is widely used for rapid prototyping, data applications, and AI demos because it lets developers create interactive UIs using pure Python — no HTML, CSS, or JavaScript required.
With just a few lines of code, you can render text, input fields, buttons, and dynamic components, making it ideal for exposing backend logic through a simple web interface.
In our project, Streamlit will act as a lightweight UI layer for our chatbot. The interface will intentionally remain minimal:
- A text area showing the conversation between the user and the AI
- A text input field to submit new messages
- A button to clear the conversation history
An important aspect is session management. Streamlit provides st.session_state, which allows us to persist variables across interactions. Since Streamlit re-runs the script at every user action, session state is essential to:
- Preserve the conversation history
- Maintain the chatbot instance
- Avoid losing context between messages
Without proper session handling, each user interaction would reset the application state. With it, we achieve a continuous and natural chat experience directly in the browser.
Streamlit App Entry Point
In Lesson 10, we implemented the Streamlit UI for our ChatBOT.
The main script is responsible for:
- Loading environment variables (
dotenv) - Initializing the logging system
- Bootstrapping the UI application
To manage the application lifecycle, we implement a Singleton pattern. This ensures that only one instance of ChatBotApp exists during execution.
@singleton
class ChatBotApp:
    def __init__(self):
        self.current_page: Page | None = None

    def run(self):
        self.select_page(ChatBotPage())

    def select_page(self, page: Page):
        self.current_page = page
        self.current_page.render()
This structure clearly separates:
- Application Bootstrap
- Navigation Logic
- Page Rendering
The run() method simply selects the initial page (ChatBotPage) and renders it.
Page Abstraction and ChatBotPage
To keep the UI modular and extensible, we define a generic base class for pages:
class Page:
    def render(self) -> None:
        raise NotImplementedError("Subclasses must implement the render method")
Every new page in the application must implement the render() method. This design makes the UI easy to extend in the future.
ChatBotPage Implementation
ChatBotPage represents the actual chatbot interface. Here we use native Streamlit components:
st.chat_input()to collect user inputst.chat_message()to display conversation messagesst.sidebar.button()to clear the chatst.session_stateto persist the chatbot instance and conversation
Main Rendering Logic
class ChatBotPage(Page):
    def render(self) -> None:
        self.__init_page()
        self.__init_messages()

        if user_input := st.chat_input("Input your question!"):
            with st.spinner(text="ChatterPy is typing ..."):
                chatbot: ChatBOT = st.session_state.chatbot
                chatbot.get_answer(question=user_input)
        chatbot: ChatBOT = st.session_state.chatbot
        messages = chatbot.get_messages()
        for message in messages:
            if isinstance(message, AIMessage):
                with st.chat_message("assistant"):
                    st.markdown(message.content)
            elif isinstance(message, HumanMessage):
                with st.chat_message("user"):
                    st.markdown(message.content)
Session Management
One critical aspect of Streamlit is that the script re-runs on every interaction. Without proper state management, the chatbot would reset at every message.
To solve this, we use st.session_state. Inside __init_page():
- If the chatbot does not exist in the session → create it
- Otherwise → reuse the existing instance
if "chatbot" not in st.session_state:
    st.session_state.chatbot = ChatBOT()
This guarantees:
- Persistent conversation history
- Context continuity
- A natural chat experience
Clear Conversation
We add a sidebar button to reset the chat:
clear_button = st.sidebar.button("Clear Conversation")
if clear_button:
    chatbot = st.session_state.chatbot
    chatbot.clear_conversation()
This keeps the UI minimal but functional.
Updating the ChatBOT Class
To allow the UI to read the conversation history, we add a get_messages() method:
def get_messages(self) -> list[BaseMessage]:
    return self._conversation.get_full_history()
This preserves a clean separation between business logic (ChatBOT) and the presentation layer (Streamlit UI).
With this structure, our chatbot is no longer just a backend system — it becomes a fully interactive web application ready for real users.
Conclusion
In this article, we added a Streamlit UI to transform our backend chatbot into a fully interactive web application.
With proper session management, a clean page structure, and seamless integration with our existing ChatBOT logic, we now have a simple yet functional browser-based interface.
This chatbot is the complete ChatterPy project, available on GitHub. What started as a step-by-step tutorial has evolved into a fully structured, modular, and extensible AI application ready to grow further. The GitHub README also includes a video demo of the ChatBOT.
If you enjoyed this article, don’t forget to give it a clap 👏, share it with your friends 🔗, and follow me for more tips and tutorials on software development 📘. Your support helps me create more content like this — thank you! 🙌